Tier 3 subjects
Using Miro in interviews for tier 3 subjects
You will need to open the Miro whiteboard, using the website or app, on your separate touchscreen device. In order to do this you may need to log in to your email account on this device so that you can access the link that is sent to you. It may be sent to you with your interview invitation, or it may be sent just before your interview. Don’t worry if you haven’t received it before your interview, the interviewers can always send you a link when the interview begins. To open your whiteboard, open this link. If you are using the app, you may be asked to log in.
Note that you will need to use a stylus in order to write on the whiteboard. Although your finger will be able to use the whiteboard, you will need to use a stylus in order to capture your natural handwriting legibly.
Miro has three modes, and the mode which is used will depend on your device. In Desktop or Tablet mode, Miro will look and feel the same. In Mobile mode, Miro will look slightly different, but it does behave the same. Some smaller tablets will use Mobile mode rather than Tablet mode. To see which mode your device uses, log in to the app and enter a whiteboard. Screenshots of each mode are given in the relevant sections below.
Desktop and tablet mode
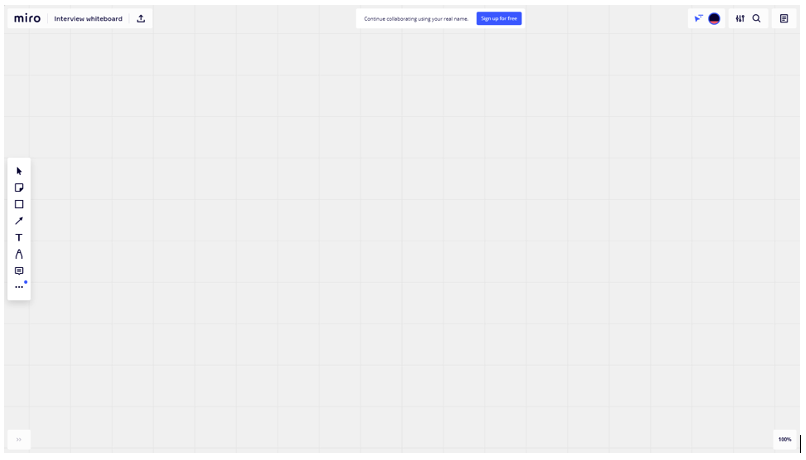
You will need to enter the interview whiteboard. The board may already have information on it from your interviewers:

To navigate around the whiteboard, place two fingers on the screen at once and move your hand to move the whiteboard.
 You can zoom in and out using the buttons that appear in the bottom right corner if you hover over the zoom percentage, or by placing two fingers on the screen at once and moving them closer together or further apart.
The toolbar on the left hand side of the screen gives you access to the tools that you might need to use during your interview. There are three that you need to familiarise yourself with:
 The Mouse tool lets you select and interact with existing items on the board.
- To select a single item on the board, press on it.
- To select multiple items on the board, hold your finger or stylus down and drag the rectangle around the items you want to select.
- When you have items selected you can delete by pressing the three dots to open the menu, and then selecting ‘Delete’.
The Text tool lets you type text into the board.
To enter text, press where you’d like the text to start, and enter the text into the box using the device’s keyboard.
You can change the font you are using, but really you should only need to change the size and possibly the colour.
The Pen tool lets you draw or write using your stylus, and also contains an eraser.
- To make markings on the board, ensure you have the pen icon selected on the additional toolbar that appears, then write or draw as naturally as possible onto the screen using your stylus.
- If you have the option to use ‘Smart Drawing’, make sure you don’t – this will distort what you write or draw.
- Take your time – if you rush, the writing may not come through correctly.
- Give yourself space by zooming in and moving the board around, rather than trying to see everything at once.
- To erase existing markings on the board, ensure you have the eraser icon selected on the additional toolbar that appears, hold your finger or stylus down and drag across any items you want to erase with your mouse.
You should not need to use any other tools on the toolbar.
 To undo and redo your own changes, press the Undo or Redo buttons at the top of the board. You should only undo changes or erase marking where instructed to do so by your interviewers
Mobile Mode for some smaller tablets
Mobile mode provides the same functionality as above, but you access the tools slightly differently.

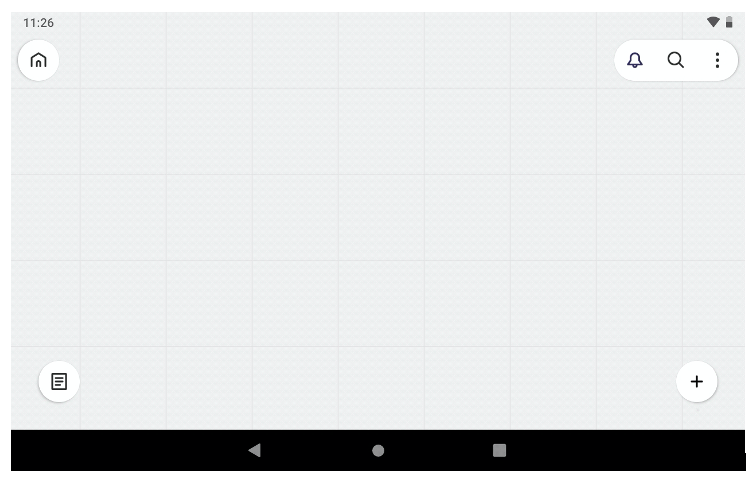
This is the navigation state – if you press down on the screen and move, it will move around the board. If you press on an existing item on the board it will select it, and if you press and hold, it will let you drag and select multiple items. When you have items selected you will have the option of deleting them. If you accidentally delete an item, click on undo.
 To make changes to the board, you first need to press the plus sign button in the bottom right:
This will open up the toolbar. There are two tools on the toolbar that you should familiarise yourself with:

The Text tool lets you type text into the board.
To enter text, press where you’d like the text to start, and enter the text into the box using the device’s keyboard.
You can change the font you are using, but really you should only need to change the size and possibly the colour.
The Draw tool lets you draw or write using your stylus, and also contains an eraser.
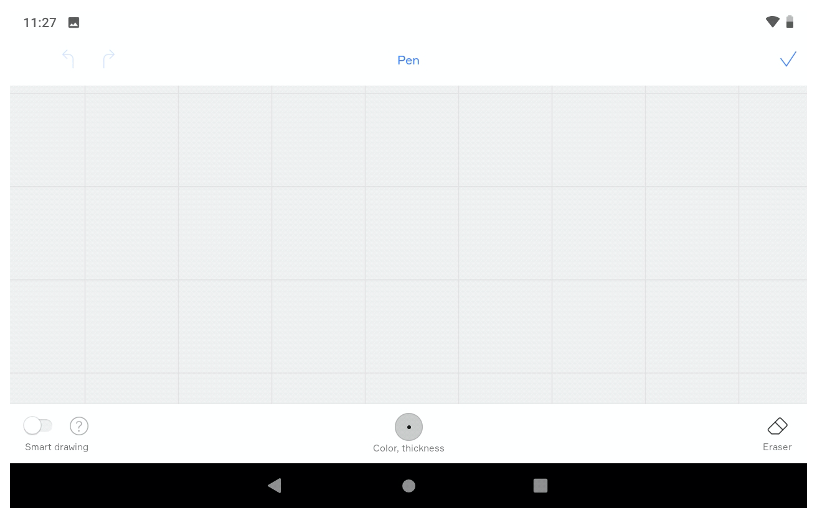
When you select the draw tool the whiteboard will appear differently. Whilst on this screen you can still navigate around the board and zoom in or out by pressing down two fingers and moving, or moving closer together or further apart.

- To switch between the pen and eraser, press the icon in the bottom right corner.
- To make markings on the board, ensure you have the pen selected, then write or draw as naturally as possible onto the screen using your stylus.
- Make sure ‘Smart drawing’ isn’t selected – this will distort what you write or draw.
- Take your time – if you rush the writing may not come through correctly.
- Give yourself space by zooming in and moving the board around, rather than trying to view everything at once.
- To erase existing markings on the board, ensure you have the eraser selected, hold your finger or stylus down and drag across any items you want to erase with your mouse.
- To undo or redo your own changes, press the undo or redo button in the top left of the screen. You should only undo changes or erase marking where instructed to do so by your interviewers
When you have finished using the Draw tool, click the tick symbol in the top right to go back to the navigation state.
You should not need to use any other tools on the toolbar.
![]() For more information on using Miro, head to www.miro.com, select a whiteboard, and click
For more information on using Miro, head to www.miro.com, select a whiteboard, and click